Home Blog

DigiPay Lite Download : Your gateway to easy and secure payments

Welcome to the DigiPay Lite download page! DigiPay Lite is an innovative mobile application designed by CSC (Common Service Centers) to facilitate seamless and secure digital transactions. Whether you’re a small business owner, a VLE (Village Level Entrepreneur), or an individual, DigiPay Lite offers a range of features that make managing your finances easier and more efficient.

Features of DigiPay Lite

  • User-Friendly Interface: DigiPay Lite provides a simple and intuitive interface, making it easy for users of all technical levels to navigate and perform transactions.
  • Multiple Payment Services: The app supports various payment services, including AEPS (Aadhaar Enabled Payment System), BBPS (Bharat Bill Payment System), IMPS (Immediate Payment Service), UPI (Unified Payments Interface), and more.
  • Secure Transactions: With robust security measures in place, DigiPay Lite ensures that all your transactions are safe and protected.
  • Real-Time Notifications: Stay updated with instant notifications for all your transactions, ensuring complete transparency and control over your finances.
  • Quick KYC Process: The app includes a straightforward KYC (Know Your Customer) process, allowing you to quickly verify your identity and start using the services without hassle.

DigiPay Lite Download and registration requirements

To access these services, you need to register with DigiPay Lite. Services include AEPS, BBPS, IMPS, UPI, recharge, top-up, and more. Note that to use Aadhaar-enabled services, you must link your Aadhaar number to your bank account. If you have trouble registering, contact your District Manager for assistance.

Digipay Lite Download

DigiPay Lite Download

Getting started with DigiPay Lite is easy. Follow these steps to download the app and begin your journey towards effortless digital payments:

Open Your Browser: Use Google Chrome, Microsoft Edge, or any other web browser.

Visit the Download Link: Type and search DigiPay Lite Download in the search bar.

Download the App: Click on the download button and follow the on-screen instructions to install the app on your Android device.

Complete KYC: After installation, complete the KYC process by following the simple steps provided within the app.

Start Using DigiPay Lite: Once your KYC is approved, you can start using DigiPay Lite for all your digital payment needs.

DigiPay Lite E-KYC Process

Important Information Before Starting KYC for DigiPay Lite

KYC is mandatory for all DigiPay Lite users. Please follow these steps for a smooth KYC process:
Ensure you are using an Android mobile phone for the best experience during the KYC process.
Have your PAN card, Aadhaar card, registered mobile number, and registered email ID ready before starting the KYC.

Make sure your device location is turned on during the KYC process.

  • After Login You will be redirected to a KYC activation flash message. Click the “Start e-KYC” button.
  • Alternatively, click the left-side menu list to view your eKYC status (Approved/Pending).
  • Enable two-factor authentication by entering your registered mobile number and email ID, then click on “Send OTP.”
  • Enter the OTP you receive in the designated field.
  • Enable all three slide buttons in the User Content and Declaration sections.
  • Click the “Submit” button.
  • PAN Verification: Complete the PAN verification process.
  • Aadhaar Verification: Complete the Aadhaar verification process.
  • Liveness Check: Take a self-photo with the CSC banner in the background, following the on-screen instructions and tips.
  • Basic Information: Enter the required basic information and click the “Submit” button.
  • The left-side menu will show your EKYC status as “Pending.”
  • Once your KYC is approved, you can start using the service.

Download DigiPay Lite

You can download the DigiPay Lite mobile app from the link below:

Download DigiPay Lite

DigiPay Lite – Everything you need to know

0

DigiPay Lite – Introduction

CSC has launched a new version of DigiPay Lite, which includes several updates. After you install the app and complete the activation and KYC process, you can start using DigiPay Lite immediately. The app is user-friendly and pays commissions right away. You can also access the service online.

Some of the key services provided by CSC DigiPay Lite include:

  • Cash Withdrawal: VLEs (Village Level Entrepreneurs) can help customers withdraw cash from their Aadhaar-linked bank accounts by entering the bank name, Aadhaar number, and completing biometric authentication.
  • Balance Enquiry: VLEs can check the balance of customers’ Aadhaar-linked bank accounts.
  • Domestic Money Transfer (DMT): VLEs can transfer money to beneficiary accounts. Both the sender (remitter) and the receiver (beneficiary) are registered, and their details are maintained in a list. This service allows easy transfer of money from the remitter’s account to the beneficiary’s account.
  • Mini Statement: Users can view a mini statement of their account transactions, allowing them to keep track of their finances.
  • AEPS Cash Deposit: Customers can deposit cash using DigiPay Lite by authenticating their Aadhaar details.

Registration and Requirements

To access these services, you need to register. Services include AEPS, BBPS, IMPS, UPI, recharge, top-up, and more. Note that to use Aadhaar-enabled services, you must link your Aadhaar number to your bank account. If you have trouble registering, contact your District Manager for assistance.

DigiPay Lite Login Instructions

Open Your Browser: Use Google Chrome, Microsoft Edge, or any other web browser.
Click Here to Go to the DigiPay Lite Login Page
Enter your Username and Password.
Click on the “Sign In” button.
You will receive an OTP via SMS within seconds.
Enter the OTP in the provided field.
Click the “Verify” button to complete the login process.

Digipay Lite

E-KYC Process

Important Information Before Starting KYC

KYC is mandatory for all DigiPay Lite users. Please follow these steps for a smooth KYC process:

  • Ensure you are using an Android mobile phone for the best experience during the KYC process.
  • Have your PAN card, Aadhaar card, registered mobile number, and registered email ID ready before starting the KYC.
  • Make sure your device location is turned on during the KYC process.
  1. After Login You will be redirected to a KYC activation flash message. Click the “Start e-KYC” button.
  2. Alternatively, click the left-side menu list to view your eKYC status (Approved/Pending).
  3. Enable two-factor authentication by entering your registered mobile number and email ID, then click on “Send OTP.”
  4. Enter the OTP you receive in the designated field.
  5. Enable all three slide buttons in the User Content and Declaration sections.
  6. Click the “Submit” button.
  7. PAN Verification: Complete the PAN verification process.
  8. Aadhaar Verification: Complete the Aadhaar verification process.
  9. Liveness Check: Take a self-photo with the CSC banner in the background, following the on-screen instructions and tips.
  10. Basic Information: Enter the required basic information and click the “Submit” button.
  11. The left-side menu will show your EKYC status as “Pending.”

Once your KYC is approved, you can start using the service.

Download DigiPay Lite

You can download the DigiPay Lite mobile app from the link below:

  • Download DigiPay Lite
Ayushman Bharat PMJAY: Everything you need to know

Ayushman Bharat PMJAY, also known as the Pradhan Mantri Jan Arogya Yojana, is a groundbreaking health protection scheme aimed at creating a healthier, more capable India. This initiative, fully financed by the government, offers extensive health coverage to millions of vulnerable families across the country. Through the CSC network, this scheme is more accessible than ever.

Ayushman Bharat PMJAY through CSCs: 

On July 31, 2018, CSC SPV and the Ministry of Health & Family Welfare signed an MoU to implement the Ayushman Bharat scheme via the CSC network across India. This collaboration has enabled seamless access to healthcare services for eligible beneficiaries.

Benefits of PM-JAY:

  • World’s Largest Health Scheme: PM-JAY is the world’s largest fully government-funded health insurance/assurance scheme.
  • Extensive Coverage: It provides a cover of Rs. 5 lakhs per family per year for secondary and tertiary care hospitalization.
  • Wide Eligibility: Over 10.74 crore poor and vulnerable families, approximately 50 crore beneficiaries, are eligible.
  • Cashless Services: Beneficiaries can access health care services without any cash payments at the point of service.
  • Preventing Poverty: Helps prevent nearly 6 crore Indians from falling into poverty due to medical expenses.
  • Comprehensive Coverage: Includes expenses for medical examination, treatment, consultation, pre-hospitalization (up to 3 days), medicines, diagnostics, intensive care, implants, accommodation, food, and post-hospitalization care (up to 15 days).
  • No Restrictions: No limitations on family size, age, or gender.
  • Nationwide Portability: Benefits are portable across India, allowing treatment at any empaneled public or private hospital.
  • Inclusive Procedures: Covers around 1,393 procedures including drugs, diagnostics, and hospital charges.
  • Equal Reimbursement: Public hospitals are reimbursed at par with private hospitals.
Ayushman Bbharat PMJAY
Ayushman Bbharat

Ayushman Bharat PMJAY – Process Flow for Enrolment:

Enrolling Beneficiaries in PMJAY:

  • First, open the PMJAY website in your browser.
  • Next, enter your CSC ID and password to log in.
  • Once logged in, the Village Level Entrepreneur (VLE) will see their details on the home page.
  • Then, select “Search Beneficiary” and choose the state and ration card parameter.
  • Input the ration card number and initiate the search.
  • For enrolment, choose “Collect KYC” for the listed family member.
  • Enter the customer’s mobile number, select the type, and verify the OTP sent to the mobile.
  • Choose Aadhaar for the ID type, agree to the consent, and proceed.
  • Authenticate using biometric data and enter the Aadhaar number.
  • Fill in the locational and relational information and proceed to the next step.
  • Enter the ration card details and submit the family details for verification.
  • Finally, a confirmation message will appear indicating that the data has been forwarded for approval.

How to Print the Ayushman Bharat PMJAY Card:

  1. Begin by opening the PMJAY website.
  2. Log in using your CSC ID and password.
  3. Select “Approved Beneficiaries” and choose the relevant state.
  4. Locate the desired beneficiary and confirm print.
  5. Complete the payment via the CSC wallet, validate, and then download the card.

 Checking Status of Beneficiaries:

  • Log in and navigate to “Approved Beneficiaries” to check the statuses of pending requests.
  • Check “Rejected Beneficiaries” to view the reasons for any rejections.

Ayushman Bharat PMJAY through CSCs ensures accessible, comprehensive health coverage for millions, alleviating financial burdens and enhancing healthcare access across India.

eShram Card: Comprehensive Guide to Registration, Benefits, and More

0

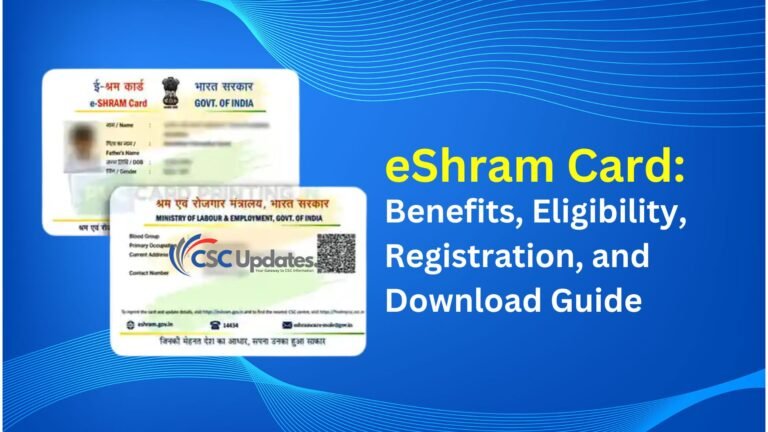
The eShram Card aims to provide social security to workers in unorganised sectors. The government has launched the eShram portal to support these workers, collecting their data to offer various benefits through numerous government schemes.

Benefits of eShram Card:

Workers with an eShram Card will receive several benefits:

  • A monthly pension of Rs.3,000 after reaching 60 years.
  • Death insurance worth Rs.2,00,000 and financial aid of Rs.1,00,000 in case of partial handicap.
  • If a worker dies due to an accident, the spouse will receive all benefits.
  • A 12-digit UAN number valid across India.

Eligibility:

To be eligible for an eShram Card, workers must:

  • Be aged between 16-59 years.
  • Have a valid mobile number linked to their Aadhaar card.
  • Not be income taxpayers.

Eshram Card

eShram Card Registration: How to Apply Online?

Applying for an eShram Card can be done via the CSC (Common Service Centre) or the eShram portal. Here’s the online application process:

  1. Visit the eShram portal (Self-registration page).
  2. Enter your Aadhaar-linked mobile number and captcha code, then click ‘Send OTP’.
  3. Input your Aadhaar number, agree to the terms, and enter the received OTP. Click ‘Validate’.
  4. Confirm your personal details.
  5. Fill in the required details, such as address and educational qualifications.
  6. Select the skill name, nature of business, and type of work.
  7. Enter your bank details and select the self-declaration option.
  8. Preview and verify the entered details, then click ‘Submit’.
  9. An OTP will be sent to your mobile number. Enter it and click ‘Verify’.
  10. The eShram Card will be generated and displayed on the screen.

Documents Required

  • Aadhaar card
  • Mobile number linked with Aadhaar
  • Bank account details

How to Download eShram Card:

To download the eShram Card after registration:

  1. Visit the eShram portal.
  2. Click on ‘Already Registered’ and select ‘Update Profile Using UAN’.
  3. Enter your UAN number, date of birth, captcha code, and click ‘Generate OTP’.
  4. Enter the OTP received on your mobile and click ‘Validate’.
  5. Confirm your personal details.
  6. Preview and verify the details, then click ‘Submit’.
  7. An OTP will be sent to your mobile. Enter it and click ‘Verify’.
  8. The eShram Card will be generated and can be downloaded.

eShram Card Helpline Number: For assistance, contact the eShram Card helpline at 14434 (toll-free, available Monday to Sunday). Email: eshramcare-mole@gov.in

Frequently Asked Questions: What is an eShram Card? The eShram Card is designed for workers in unorganised sectors, offering benefits like pensions, death insurance, and financial aid.

Who can apply for an eShram Card? Any worker aged 16-59 years in the unorganised sector, with a valid mobile number linked to Aadhaar, can apply.

How to check eShram Card balance? Visit the eShram portal, log in under ‘Already Registered’, and select ‘Check Payment Status’ or ‘Know Your Payment Option’.

How much money will eShram Card holders get? Cardholders will receive a monthly pension of Rs.3,000 after age 60, death insurance of Rs.2 lakh, and Rs.1 lakh for partial handicap.

How do I download an already registered eShram Card? Visit the eShram portal, log in under ‘Already Registered’, and follow the instructions to download your card.

Tele Law Your Questions Answered: Everything You Need to Know About

Introduction: Tele Law, a collaborative initiative between MeitY and the Department of Justice under the Ministry of Law & Justice, aims to provide citizens in rural areas, especially marginalized communities, with access to tele-legal consultations. This service leverages the network of Common Services Centres (CSCs) to deliver legal information and advice right to the citizens’ doorsteps.

Key Features of Tele Law

  1. Programme Benefits: Tele Law offers free legal aid to eligible individuals under Section 12 of the Legal Services Authorities Act, 1987. This includes women, children, Scheduled Castes, Scheduled Tribes, and other marginalized groups.
  2. Tele-Law Mobile Application: To reach remote areas effectively, a dedicated mobile app has been developed for seamless access to legal services.
  3. Tele-Law Web Portal: The Tele-Law Portal provides comprehensive programme details in 22 official languages and features a dashboard for real-time case tracking.
  4. IEC Materials: Educational resources like e-tutorials, pamphlets, and radio jingles are available on the portal to raise awareness.
  5. Panel Lawyers: Pre-litigation advice is provided by stationed panel lawyers, and cases can be forwarded to State Legal Services Authorities (SLSAs) or District Legal Services Authorities (DLSAs) if necessary.
  6. State Coordinators: These coordinators ensure smooth project implementation and monitor progress within states and UTs. They also train Village Level Entrepreneurs (VLEs) and engage with local stakeholders.

Tele Law Benefits:

  • Free Legal Services: All citizens of India can access Tele Law services at no cost.
  • VLE Commission: VLEs receive a commission of Rs. 65 per case registration, with a maximum of 50 cases per month.
  • Real-time Data: The dedicated Tele-Law dashboard captures real-time data on registered cases and consultations.
  • Empowering the Marginalized: Tele Law has become a popular platform, giving a voice to the voiceless and earning public trust.

Tele Law Process Flow:

Register as an Applicant for Tele-Law:

  1. Download the Mobile App:
  2. Register Profile: Use the mobile app or visit a CSC to register your profile.
  3. Add Case Details: Enter the necessary details about your case.
  4. Select Advocate: Choose an advocate and preferred time slots.
  5. Receive Advice: Get pre-litigation advice from the selected advocate.
  6. Case Completion: If further litigation is needed, forward the case to Nyaya Bandhu (Pro Bono).
  7. Nyaya Bandhu Verification: Advocates will verify and accept or reject the case, with reassignment if necessary.
  8. Completion: The case will be marked as complete after consultation.

Tele Law

Register a Case by VLE for Tele Law Consultation:

  1. Login to Digital Seva Portal: Use Digital Seva Portal with your User ID and Password.
  2. Search for Tele-Law: Find Tele-Law in the search bar.
  3. Access Dashboard: Navigate to the Tele Law dashboard.
  4. Register Case: Enter beneficiary details and register the case.
  5. Select Advocate: Choose an advocate and time slot for consultation.
  6. Confirmation: Beneficiaries receive SMS confirmation of the consultation.
  7. Consultation: Beneficiaries visit the CSC for legal advice from panel lawyers.
  8. Close Case: The case will be marked as closed after the consultation.
  • What is Tele-Law Service? Tele-Law uses video conferencing and telephone services to connect lawyers with litigants needing legal advice. It targets marginalized and disadvantaged individuals, providing services through CSCs at the gram panchayat level.
  • Benefits of Tele-Law Service:
    • Time and Cost Efficient: Enables citizens to seek legal advice without wasting time or money
    • Free Service: Available at no cost for all citizens.
  • Eligible Cases for Tele-Law Service:
    • Dowry, family disputes, divorce, and domestic violence protection.
    • Sexual harassment and abuse, workplace harassment.
    • Maintenance of women, children, and senior citizens.
    • Property and land matters.
    • Employment rights like equal pay and minimum wages.
    • Maternity benefits and feticide prevention.
    • Child protection, education rights, and anti-child labor laws.
    • Criminal matters like bail and FIR registration.
    • Atrocities against SC/ST and their rehabilitation.
    • Various other issues, including government schemes and financial matters.
  • Role of Village Level Entrepreneur (VLE): VLEs operate CSCs and facilitate Tele-Law services. They:
    • Educate beneficiaries about the service.
    • Register applicants and upload necessary documents.
    • Schedule appointments with panel lawyers.
    • Ensure communication and coordination through SMS notifications.
  • Legal Advice Seeker/Beneficiary: Any person seeking legal advice through CSCs. They must visit the CSC for consultation.
    • Through Tele Law, rural and marginalized communities can now access essential legal aid easily and effectively, ensuring justice is within everyone’s reach.

Read about other CSC Services

How to Use SPARSH for Defence Pensioners ?

SPARSH the System for Pension Administration (Raksha), is a transformative initiative by the Ministry of Defence aimed at providing a comprehensive solution for managing pensions for defence personnel. This system addresses the pension sanction and disbursement needs for the Army, Navy, Air Force, and Defence Civilians.

Sparsh is managed by the Defence Accounts Department (DAD) through the Principal Controller of Defence Accounts (Pensions) in Allahabad, ensuring all three services and allied organizations are covered.

Objectives: The primary objectives of Sparsh service centres include:

  1. Reaching out to pensioners in remote locations to provide timely and transparent services.
  2. Answering queries and resolving issues interactively, especially for non-tech savvy pensioners. This involves:
    • Service Requests (e.g., mobile or address changes, Aadhaar updates)
    • Grievances (e.g., anomalies in pension entitlements)
    • Information (e.g., pension slips)
  3. Performing identification.
  4. Initiating family pension.
  5. Tracking service requests promptly to reduce grievances.

Benefits:

  • Timely and accurate payment to pensioners.
  • Real-time status updates on pension budgets.
  • Multiple channels for pensioners to access services, including a web portal, mobile app, CSCs, and a call centre.
  • A structured, SLA-based grievance redressal mechanism.
  • Complete transparency for pensioners, offering a full view of their pension account from commencement to cessation.
  • The ability for pensioners to furnish declarations, nominations, and requests for commutation digitally.
  • Paperless and hassle-free processing of requests.

SPARSH Centers Functionalities:

Sparsh service centres support several key functions for both registered and unregistered users:

Registered Users:

  • Identification using a manual life certificate or Aadhaar.
  • Profile management.
  • Commutation requests.
  • Income tax declarations.
  • Grievances for pension payment-related issues.

Unregistered Users:

  • Reporting death, missing persons, or convictions.
  • Initiating family pensions.
  • Raising grievances for pensioners.
  • Tracking the status of previously raised service requests or grievances.

Sparsh

Sparsh – Process Flow:

Login into the System:

  1. Open the SPARSH web portal at SPARSH Portal.
  2. Click on the login tab.
  3. Enter your username, password, CAPTCHA code, and click on the login button.

Authentication of Users:

  1. Click on the Service Request & Grievance tab after logging in.
  2. Select “Registered” under User Type.
  3. Choose an appropriate identifier (Cadet Number, Bank Account No, Personal No, PPO No, Regimental No.) and enter the identifier value.
  4. Click on the Search tab.
  5. Select the pensioner’s name.
  6. Choose “Send OTP” under Authentication Type and click on Proceed.
  7. Enter the OTP sent to the registered mobile number and click on verify and proceed.
  8. A message will confirm “Verified Successfully.” Click on OK.

Income Tax Declaration:

  1. After authentication, select Investment Declaration from the Service type dropdown.
  2. Upload supporting documents and enter remarks as needed, then click on Proceed.
  3. Confirm by clicking Proceed on the confirmation message.
  4. Fill in the required details and click on Validate & Proceed.
  5. An acknowledgement message will appear. Confirm by clicking Yes.
  6. A token number and registration confirmation will be sent to the registered mobile number.

Raise Grievance:

  1. After authentication, select Grievance from the Service type dropdown and click on Proceed.
  2. Confirm the service initiation.
  3. Enter the required details and select the appropriate grievance category.
  4. Click on Add to include details. Use the comments box for any issues not covered.
  5. Upload supporting documents if available and click on Submit.
  6. Save and submit to receive a Tracker ID for future reference.

By utilizing Sparsh, defence pensioners can experience a seamless and transparent pension administration process, ensuring their needs are met efficiently and effectively.

Read more G2C Service

CSC Jeevan Pramaan: Simplify Your Pension with Digital Life Certificates

CSC Jeevan Pramaan is a biometric-enabled digital service for pensioners. This service allows Central/State Government pensioners and those from other government organizations to obtain their life certificates with ease. One key requirement for pensioners post-retirement is to provide life certificates to authorized pension disbursing agencies, ensuring their pensions are credited to their accounts.

Traditionally, obtaining a life certificate required the pensioner to either appear in person before the Pension Disbursing Agency or have it issued by the authority they previously served. With CSC Jeevan Pramaan, this process is now more accessible.

CSC Jeevan Pramaan – Benefits:

  • Ease of Submission: Pensioners can easily submit their Digital Life Certificates (DLC) through CSCs.
  • Biometric Verification: Using Aadhaar-based biometric authentication reduces fraudulent activities.
  • Notification: Pensioners receive SMS notifications upon successful certificate generation.
  • Regular Pension Disbursement: Ensures pensions are regularly credited to the pensioner’s account.
  • Convenience: Senior citizens can conveniently obtain their DLC by visiting nearby CSC centres.
  • Time saving: Streamlines the process, saving time and effort.

Requirements:

To generate a Jeevan Pramaan certificate, pensioners need:

  • Aadhaar Number
  • Name
  • Mobile Number
  • Pension Account Number
  • Bank Details

CSC Jeevan Pramaan

CSC Jeevan Pramaan Process Flow:

    1. Login to Digital Seva Portal:
      • First, the Village Level Entrepreneur (VLE) logs in using their CSC-ID and password.
    1. Access Jeevan Pramaan:
      • Next, click on the Jeevan Pramaan option.
    1. Register Biometric Device:
      • Then, fill in the registration form for the biometric device and submit it.
    1. Generate Jeevan Pramaan Certificate:
      • After that, click on “New Jeevan Pramaan” and complete the registration form with the necessary details.
      • Perform biometric authentication using a fingerprint or iris scanner.
      • Enter the OTP received on the pensioner’s Aadhaar-linked mobile number and verify it.
      • Upon successful authentication, a Pramaan ID is generated.
    1. Download Certificate:
      • Finally, visit the Jeevan Pramaan Portal.
      • Enter the Pramaan ID, captcha code, and OTP received on the pensioner’s mobile number.
      • Download the Life Certificate.

FAQ:

What is Jeevan Pramaan/Digital Life Certificate (DLC)? Jeevan Pramaan is a biometric-enabled, Aadhaar-based Digital Life Certificate for pensioners. It is generated using the pensioner’s Aadhaar number and biometrics.

Is Pramaan ID or Jeevan Pramaan valid for life? No, the Pramaan ID/Jeevan Pramaan is not valid for life. The validity period is determined by the Pension Sanctioning Authority. A new certificate must be obtained once the validity period expires.

What information is required to generate the Jeevan Pramaan? Pensioners need to provide their Aadhaar Number, Name, Mobile Number, and self-declared pension-related information such as PPO Number, Pension Account Number, Bank Details, and information about the Pension Sanctioning and Disbursing Authorities. Biometric data (iris or fingerprint) is also required.

Is the certificate valid? Yes, the Digital Life Certificate is a valid document recognized under the IT Act. It eliminates the need for the pensioner to appear before the Pension Disbursing Authority.

Is Aadhaar number mandatory for generating Jeevan Pramaan? Yes, an Aadhaar number is mandatory for generating the Jeevan Pramaan Digital Life Certificate.

CSC Finance Service

Are you interested in learning more about financial services in CSC ? Visit CSCUPDATE.COM for further information.

CSC ITR Filing – How to become an ITR Filing expert

CSC ITR FilingIncome Tax Return (ITR) filing is a crucial annual obligation for every individual earning income in India. The process has been made convenient through the Digital Seva Portal in collaboration with Tax Genius and Tax2Win firms.

Benefits of CSC ITR Filing:

Filing income tax returns offers several advantages to taxpayers, including:

  1. Seamless Processing of Loans: Simplifies securing loans like home or car loans.
  2. Claiming Refund: Allows individuals to claim tax refunds from the IT Department.
  3. Easy Visa Processing: Essential for visa applications as proof of income.
  4. Medical Insurance Deductions: Offers deductions on health insurance premiums under Section 80D.
  5. Loss Compensation: Companies can carry forward tax losses to future years.
  6. Interest Deduction: Enables interest deduction while applying for home loans.

Modes of Filing Return of Income:

  • Paper form
  • filing Electronically 
  • Electronic filing with verification code
  • Electronic transmission with subsequent verification

Document Attachment Requirements: ITR forms are attachment-less. Taxpayers are not required to attach any documents but must retain them for future reference.

Difference Between e-Filing and e-Payment:

  • E-payment: Electronically paying taxes.
  • E-filing: Electronically furnishing the return of income.

CSC ITR Filing

CSC ITR Filing – Process Flow:

ITR Filing with Tax Genius:

  1. To begin, login to the Digital Seva Portal using your CSC-ID and password.
  2. Next, navigate to the Income Tax section and specifically choose Tax Genius for ITR Filing.
  3. Then, download the Income Tax Filing Form and proceed to fill it out.
  4. After filling out the form, submit it and continue with the transaction process.
  5. Finally, upon successful submission, you will receive an acknowledgment receipt via SMS and email.

ITR Filing with Tax2Win:

  1. Start by logging in to the Digital Seva Portal using your CSC-ID and password.
  2. Next, opt for Tax2Win for ITR Filing from the available options.
  3. Then, either fill in the basic details manually or retrieve a pre-filled ITR if available.
  4. Once the form is completed, submit it and move forward with the transaction process.
  5. Finally, upon successful submission, you’ll receive an acknowledgment receipt for the transaction.

By following these steps, taxpayers can fulfil their ITR filing obligations conveniently and efficiently through the CSC’s Digital Seva Portal.

CSC Registration: How to Become a VLE ?

CSC Registration: Step-by-Step Guide to Becoming a VLE

CSC Registration – Under the National e-Governance Plan (NeGP) by the Indian government, Common Services Centers (CSCs) were created. These centers use technology to offer various services. They provide government, social, and private sector services like agriculture, health, education, entertainment, FMCG products, banking, and utility payments.

How CSC Works ?

CSC e-Governance Services India Limited, also known as CSC SPV, connects local people with government departments, banks, insurance companies, and private service providers. This is done through a network of citizen service points that use IT technology.

Who are VLEs?

Village Level Entrepreneurs (VLEs) deliver various government and non-government services to end consumers from the CSC outlet, which is usually owned by them.

What is a CSC Centre?

A CSC Centre is the place from where the VLE operates all activities and serves users or customers.

CSC Registration

How to Register as a VLE ?

To register as a Village Level Entrepreneur (VLE) in the CSC, follow these steps:

  1. To Begin Visit CSC Registration and apply under new registration.
  2. Then Click on the “Apply” button and proceed.
  3. Next Select the application type and enter your TEC and IIBF numbers.
  4. Afterwards Validate your mobile number and fill out the form.
  5. Once done Enter your Aadhaar number and validate it.
  6. After authentication, proceed to fill in the information under the following tabs: Personal, Kiosk, and add the Captcha Text.
  7. Subsequently Enter your email and PAN number and validate them.
  8. Following this Enter your banking details, validate them, and proceed to upload the required documents.
  9. Lastly, Review your details and click on the “Submit” button to register. An application reference ID will be generated.
  10. and you will receive an acknowledgment email regarding the successful submission of your application.
  11. Next Download the CSC App from the Play Store/App Store and continue the registration process by uploading a geotagged video of yourself and the KIOSK.
  12. Finally, A CSC ID and temporary password will be generated within 48 hours of the successful submission of the application.

For applications with failed digital verification, a manual quality check will be done before the CSC ID is created.

Required Documents for CSC Registration

  • Voter List or Elector’s Photo Identity Card (EPIC)
  • Valid Aadhaar Card as Proof of Address
  • Highest Qualification Details and related documents
  • Passport size colored photograph
  • PAN Card
  • Banking Correspondent (BC)/ Banking Facilitator (BF) Course certificate
  • Valid Indian Passport (optional)
  • Police Verification Report (optional)
  • IMPS transaction receipt to verify bank account number

Note: Only .jpg/.png/.pdf file types are accepted, and the file should be less than 1MB in size.

System Requirements for CSC Registration

  • Minimum of 1 PC (Desktop/Laptop)
  • UPS
  • Minimum 1 Printer (Deskjet/Laser)
  • Digital/Web Camera
  • Genset/Inverter/Solar Panel for Power Backup
  • Broadband Connectivity
  • Furniture
  • Biometric and/or Iris Devices

Fees for Registering as a VLE

There is no fee for registration as a VLE. It is free of cost.

CSC Registration Application Status

To track your application:

  1. Visit CSC Registration
  2. Click on the “Apply” tab and select the “Status Check” option.
  3. Enter your application ID and Captcha Text.
  4. Click on the “Submit” button.

Prerequisites for Enrolling on the Registration Portal

  • Must be an ordinary resident of an Indian territory, at least 18 years old. and an elector.
  • Adequate business space (minimum 50 sq ft recommended).
  • Pass the Tele-Entrepreneurship Course (TEC) and Banking Correspondent (BC)/ Banking Facilitator (BF) course.
  • Possess a valid Aadhaar Number and PAN Number.
  • Preferably possess an Indian Passport.
  • Must have a Bank Account in any PSU/Scheduled Commercial Bank/Regional Rural Bank.
  • Passed 10th Standard Exam.
  • Must possess working knowledge in English and computer operation.
  • Must have an e-Mail ID and a Mobile number.

By following these steps and meeting the requirements, you can successfully register as a VLE and start providing essential services through the CSC platform.

Slug: csc-registration

This guide provides all the necessary information for registering as a VLE under the CSC scheme, ensuring a smooth and efficient registration process.

CSC Dak Mitra: Simplified Parcel Booking and Tracking

CSC Dak Mitra: Efficient Parcel Booking and Tracking for VLEs

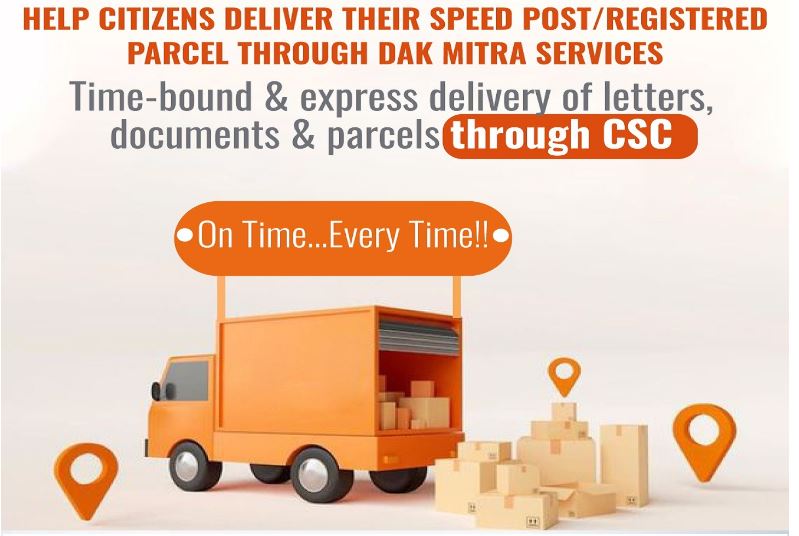
CSC Dak Mitra offers a streamlined solution for CSC VLEs, enabling them to handle various tasks like parcel booking, tracking, and generating reports. This service is designed to benefit all citizens, providing a reliable and efficient method for managing postal services.

Through the CSC Dak Mitra portal, VLEs can perform essential functions, including parcel booking, tracking parcels, and generating detailed reports. These services help in ensuring that postal tasks are handled efficiently and accurately.

CSC Dak Mitra

Step-by-Step Guide to Using CSC Dak Mitra

To use the CSC Dak Mitra portal, follow these steps:

  1. Login: Visit https://dakmitra.csccloud.in/ and log in to the DAK MITRA portal. Click ‘Continue’ to connect.
  2. Booking Option: Click on the booking option on the left-hand side.
  3. Fill Information: Enter the sender’s and receiver’s information. Mandatory fields are marked with an asterisk (*).
  4. Select Article Details: Choose the article details from the dropdown and select either speed post or registered parcel.
  5. Tariff Details: Enter the tariff details after filling in the article information. Click on the ‘Tariff Calculation’ button. Once the base tariff and GST are visible, press the ‘Pay’ button.
  6. Password and Wallet Pin: Enter your password and validate it. Then, enter your wallet pin and click the ‘Pay’ button.
  7. Receipt and Barcode: Download the receipt and paste the barcode on the parcel. Take the parcel to the nearest post office.
  8. Tracking: The ARTICLE-ID will be available for tracking. Use the ‘Home’ button to return to the main page.

 Important Points for CSC VLEs While Booking Parcels

  1. Parcel Criteria: The article must weigh over 500 grams or exceed the dimensions of 38 cm x 27 cm x 2 cm, or be declared as “Merchandise.”
  2. Size and Weight: Articles above the prescribed size or weight are treated as parcels, regardless of content.
  3. Barcode Series: Parcels will have a barcode starting with ‘F’.
  4. Forbidden Items: Ensure parcels do not contain prohibited items such as explosives, inflammable substances, obscene materials, or living creatures.
  5. Domestic Only: Only domestic speed and registered parcels are accepted. No international articles are permitted.
  6. Mapped Post Office: VLEs must bring booked articles to their mapped post office only.
  7. Acceptance: Parcels brought by VLEs do not need to be re-booked at the post office counter and will be accepted in the back office.
  8. Post Office Changes: Any changes in the linked post office should be communicated to CSC-SPV.
  9. Packing Standards: Ensure parcels are well-packed in carton boxes of the appropriate size with clear labels. Cloth-packed parcels should be enclosed in plastic covers or suitable cartons.

By following these steps and guidelines, CSC VLEs can efficiently manage parcel bookings and ensure smooth postal operations for their communities.